Selenium Waits
Waits are essential in Selenium automation to ensure synchronization between the test script and the web application.
Implicit Wait
- Tells the WebDriver to poll the DOM for a specified amount of time when trying to find an element or elements if they are not immediately available.
driver.manage().timeouts().implicitlyWait(10, TimeUnit.SECONDS);
Explicit Wait
Allows you to wait for a specific condition to occur before proceeding with the test execution.
More flexible than implicit waits as they allow for complex conditions.
WebDriverWait wait = new WebDriverWait(driver, 10);

WebElement element = wait.until(ExpectedConditions.visibilityOfElementLocated(By.id("element_id")));
Fluent Wait
A more advanced and customizable form of explicit wait.
Allows you to define the polling frequency, ignore specific exceptions, and specify custom conditions.
// Create a fluent wait with a 10-second timeout and 2-second polling interval

Wait<WebDriver> wait = new FluentWait<>(driver)
.withTimeout(Duration.ofSeconds(10))
.pollingEvery(Duration.ofSeconds(2))
.ignoring(NoSuchElementException.class);

// Wait for an element to be present and clickable

WebElement element = wait.until(ExpectedConditions.elementToBeClickable(By.id("element_id")));
Dealing with Synchronization Issues in Selenium:
Synchronization issues are common in Selenium testing due to the asynchronous nature of web applications and varying loading times. Here are some strategies to mitigate synchronization problems:
1. Use Explicit Wait: Explicit waits are the recommended approach for handling synchronization issues. They allow you to wait for specific conditions to be met before proceeding with the test execution, ensuring that elements are loaded and ready for interaction.
2. Implement Custom Expected Conditions: In addition to the built-in expected conditions provided by Selenium, you can create custom expected conditions tailored to your application's behavior and requirements.
public static ExpectedCondition<Boolean> elementIsVisible(final By locator) {

    return new ExpectedCondition<Boolean>() {

        @Override
        public Boolean apply(WebDriver driver) {
            WebElement element = driver.findElement(locator);
            return element.isDisplayed();
        }
    };
}
3. Use Fluent Waits: Fluent waits offer more flexibility and customization options compared to explicit waits. They allow you to define polling intervals, ignore specific exceptions, and combine multiple conditions for complex scenarios.
4. Implement Retry Mechanisms: In cases where certain actions or operations fail due to synchronization issues, you can implement retry mechanisms that attempt the operation multiple times with a specified delay between attempts.
5. Leverage Logging and Debugging*: Incorporate comprehensive logging and debugging techniques to identify synchronization issues and pinpoint the root cause of failures.
Selenium Window Handling
Selenium provides methods to handle and switch between multiple browser windows or tabs.
Get Window Handles
Retrieve the handle (unique identifier) of the current window or all open windows.
String currentWindowHandle = driver.getWindowHandle();

Set<String> windowHandles = driver.getWindowHandles();
Switch Between Windows
Switch to a specific window using its handle.
for (String handle : windowHandles) {
    if (!handle.equals(currentWindowHandle)) {
        driver.switchTo().window(handle);
        break;
    }
}
Selenium Mouse and Keyboard Actions
Selenium offers the ability to simulate mouse and keyboard actions, enabling more advanced testing scenarios.
Mouse Actions
Click
Actions actions = new Actions(driver);
WebElement element = driver.findElement(By.id("element_id"));
actions.click(element).perform();
Double-click
Actions actions = new Actions(driver);
WebElement element = driver.findElement(By.id("element_id"));
actions.doubleClick(element).perform();
Right-click
Actions actions = new Actions(driver);
WebElement element = driver.findElement(By.id("element_id"));
actions.contextClick(element).perform();
Hover
Actions actions = new Actions(driver);
WebElement element = driver.findElement(By.id("element_id"));
actions.moveToElement(element).perform();
Scroll Up/Down a page
JavascriptExecutor js = (JavascriptExecutor) driver;

WebElement element = driver.findElement(By.id("element_id"));
js.executeScript("arguments[0].scrollIntoView();", element);

//scroll by pixels: browser window is vertically scrolled down by 300 pixels.
js.executeScript("window.scrollBy(0 , 300)");
Click and Hold
Actions actions = new Actions(driver);
WebElement element = driver.findElement(By.id("element_id"));
actions.clickAndHold(element).perform();
Drag and Drop
Actions actions = new Actions(driver);

WebElement element = driver.findElement(By.id("element_id"));

actions.dragAndDrop(source, target);

actions.build().perform();

//Drag and drop by pixels
actions.dragAndDropBy(element, 250, 300);

actions.build().perform();
Keyboard Actions
Simulate keyboard input, including text entry, key presses, and key combinations.
Actions actions = new Actions(driver);

WebElement textField = driver.findElement(By.id("text_field"));

actions.moveToElement(textField).click().sendKeys("Hello, World!").build().perform();
Key Up and Key Down
Actions actions = new Actions(driver);

WebElement textField = driver.findElement(By.id("text_field"));

actions.keyUp(Keys.SHIFT);

actions.build().perform();

actions.keyDown(Keys.SHIFT);

actions.build().perform();
Other keys like Keys.SHIFT,Keys.ALT and Keys.TAB etc can also be used depending on the need.
SendKeys
Actions actions = new Actions(driver);
WebElement username = driver.findElement(By.id("text_field"));

//default way
name.sendKeys(username);

//using actions
actions.sendKeys(username ,keys);
Combining Keyboard input
- Keyboards inputs if needed can also be combined and send together like
Actions actions = new Actions(driver);

WebElement element = driver.findElement(By.id("element_id"));

element.keyDown(Keys.CONTROL).sendKeys("a").keyUp(Keys.CONTROL).build().perform();
Selenium WebDriverManager
WebDriverManager is a utility that automatically manages the setup and configuration of WebDriver binaries, eliminating the need for manual browser driver installations.
For getting started WebDriverManager needs to be added up in the dependencies of your gradle project like in build.gradle
// https://mvnrepository.com/artifact/io.github.bonigarcia/webdrivermanager
implementation group: 'io.github.bonigarcia', name: 'webdrivermanager', version: '5.8.0'
Then we can start using it in our project like:
import io.github.bonigarcia.wdm.WebDriverManager;

WebDriverManager.chromedriver().setup();
WebDriver driver = new ChromeDriver();
Selenium Screenshots
Capturing screenshots can be useful for debugging, documenting issues, or generating reports.
Capture Entire Page Screenshot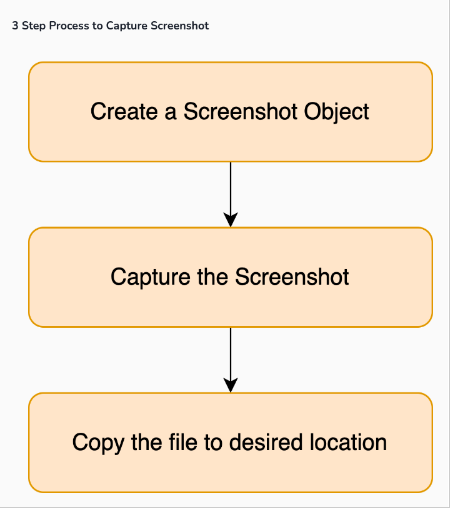
Steps in code:
// 1. Cast web driver object to TakeScreenshot object
TakesScreenshot scrShot = ((TakesScreenshot) webdriver);

// 2. Call getScreenshotAs() method to create image file
File SrcFile = scrShot.getScreenshotAs(OutputType.FILE);

// 3. Copy file to destination
String fileName = “screenshot1.png”;

File DestFile = new File(fileName);

FileUtils.copyFile(SrcFile, DestFile);
Capture Element Screenshot
WebElement element = driver.findElement(By.id("element_id"));

File screenshotFile = element.getScreenshotAs(OutputType.FILE);

FileUtils.copyFile(screenshotFile, new File("path/to/element_screenshot.png"));
Recommended way to taking and organizing Screenshots
public static void takeScreenshot(WebDriver driver, String screenshotType, String description) {

       try {
           File theDir = new File("/screenshots");
           if (!theDir.exists()) {
               theDir.mkdirs();
           }

           String timestamp = String.valueOf(java.time.LocalDateTime.now());
           String fileName = String.format("screenshot_%s_%s_%s.png", timestamp, screenshotType, description);

           TakesScreenshot scrShot = ((TakesScreenshot) driver);

           File SrcFile = scrShot.getScreenshotAs(OutputType.FILE);
           File DestFile = new File("screenshots/" + fileName);
           FileUtils.copyFile(SrcFile, DestFile);
       } catch (Exception e) {
           e.printStackTrace();
       }
}
Was this article helpful?
That’s Great!
Thank you for your feedback
Sorry! We couldn't be helpful
Thank you for your feedback
Feedback sent
We appreciate your effort and will try to fix the article